Published January 5th, 2020
Learning by doing: configuring Void Linux
Looking off the beaten path
Linux distributions mainly come in two kinds - the ready-to-go, preconfigured systems like Ubuntu, OpenSUSE and Fedora, versus the minimalist, barebones systems like Arch, Void, KISS and Gentoo. There are dozens of tutorials on how to install these systems, but I’d like to touch on the why.
Arch, Void, Gentoo, etc are very much batteries-not-included distributions, not even including a graphical interface by default. (Of course, any sane desktop user will quickly remedy this.) Of the three, Void has the most user-friendly installer, but all of them upon install boot to a black screen with blinking cursor.
(The differences between these kinds of distributions likely make little difference to you. They mainly lie in whether or not you want your software distributed as binaries or source code, and which package manager you prefer. Having used the other two before, I thought I’d give Void a try this time).
Whilst you can just install KDE on any of these distributions and end up with a traditional Linux desktop, this is the setup I built for my main machine: 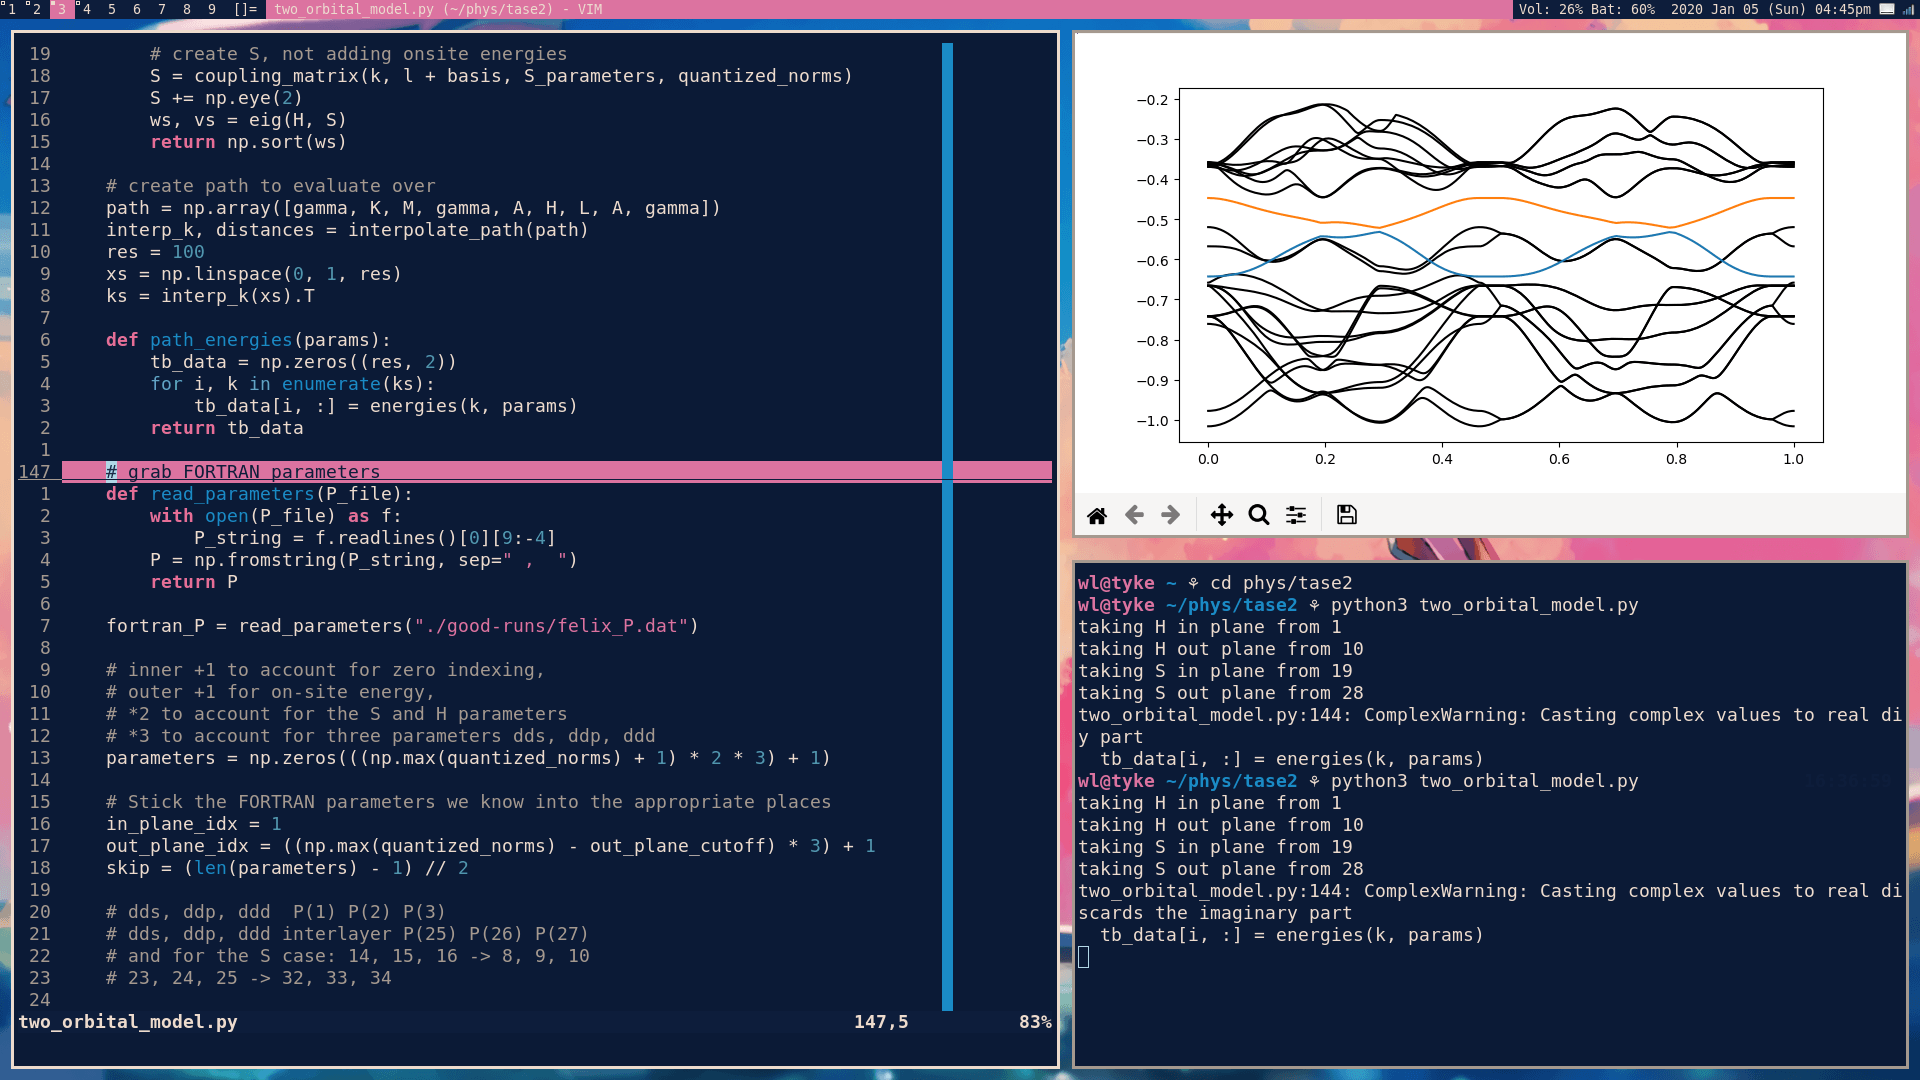
It’s using dwm as the window manager, with lots of st windows open for editing code, running programs, etc. As well as looking nice, it’s very functional, with fuzzy-finding of programs to launch and multiple workspaces (or “tags”) denoted by the numbers in the top left.
Why bother?
Of course, going from no graphical interface to a complete working system is a lot of effort compared to just using Ubuntu or OpenSUSE, both of which boot to properly-configured, powerful systems.
However, whenever I went to configure something on my OpenSUSE install, I kept hitting the same stumbling blocks of not really knowing how my system worked. I didn’t know where any individual setting might be, or which program might be responsible for the behaviour I wanted to change. Even when I did manage to get something working as I liked it, it was very much depending on a big stack of unknown configuration that, with updates and such, could easily move under me.
This Void system is a welcome end to that confusion. There are barely a dozen system services running, and on login I run a couple more (personally-chosen!) programs in order to get the experience I want. (The only piece of the puzzle I still don’t really understand is the giant NetworkManager, but it’s always worked well for me and the alternatives seem a little arcane).
This means that if I want to change what happens when I log in, I know that’s just a change in my .xprofile. If I want the system to do something on going to sleep, I know that’s just in zzz. If I want my window manager to have different colors, that’s just changing a line of code and a recompile, not messing around with trying to find out where a) you can get themes and b) where they actually go!
Making decisions, saving decisions
I needed to configure a fair few programs to get this bare system working the way I wanted it to. Having config files just scattered around is confusing and can make it difficult to remember how or why you did something, so I chose to keep all important config files in the same folder, ~/dot.
I have a very simple shell script that symlinks all the files to the places they need to be:
#!/usr/bin/env sh

set -e

echo 'Installing dotfiles...'

local here=$(dirname $0)
for file in .config .screenrc .vim .vimrc .xinitrc .xprofile .zshrc .newsboat; do
    if [[ $(readlink -f $HOME/$file) != $(readlink -f $here/$file) ]]; then
        ln -i -s -T $here/$file $HOME/$file
        echo "linked $file"
        fi
done
(I copied this script in part from eevee, who’s .zshrc and .vimrc have also been sources of inspiration in the past. Highly recommended!)
In this ~/dot folder, I also keep void.md, a set of crib notes on how I installed the system, so I can replicate it if needs be.
Using tools that rely on simple config files (or folders) has the benefit of reproducibility - you can back-up all your config files, and use them on any system you have access to. No more changing half a dozen menus every time you reinstall a program or change machine!
I track revisions to everything in this folder, and back it up, with git. That way, my entire preferred computing setup just lives in a simple folder. If I ever get a new laptop, need to reinstall or need to use a shared machine, I can grab some or all of my system config with a simple git clone. In fact, I’ve already done this, as I first installed the system in a VM and spent some time tinkering with it before committing it to metal. (It went seamlessly!)
Besides just the understanding and reproducibility, I have discovered a third benefit in finding new and powerful tools I wouldn’t have previously considered. dwm looks pretty scary, but is actually very simple and very powerful. In particular, tagging windows and then displaying different combinations of tags on the fly is a welcome addition to my tool-belt.
If you’re a Linux user who’s looking to understand how their computer works a little better, I can highly recommend spending a Sunday messing around with one of these distributions. Having complete confidence in how and why my computer is doing things just makes it so much easier to reason about computer problems you have in future, and you’ll definitely discover some cool things along the way!